
Using Progress bars in loops
Great for interactive scripts, progress bars give on-screen feedback to the user.
Why Progress Bars?
Back in the PowerShell outputs lesson, a few different ways to output text and objects to the screen were explored. During loops, the Write-Progress command becomes available. Progress bars are useful when long running scripts need to show they’re still running.
PowerShell 7+
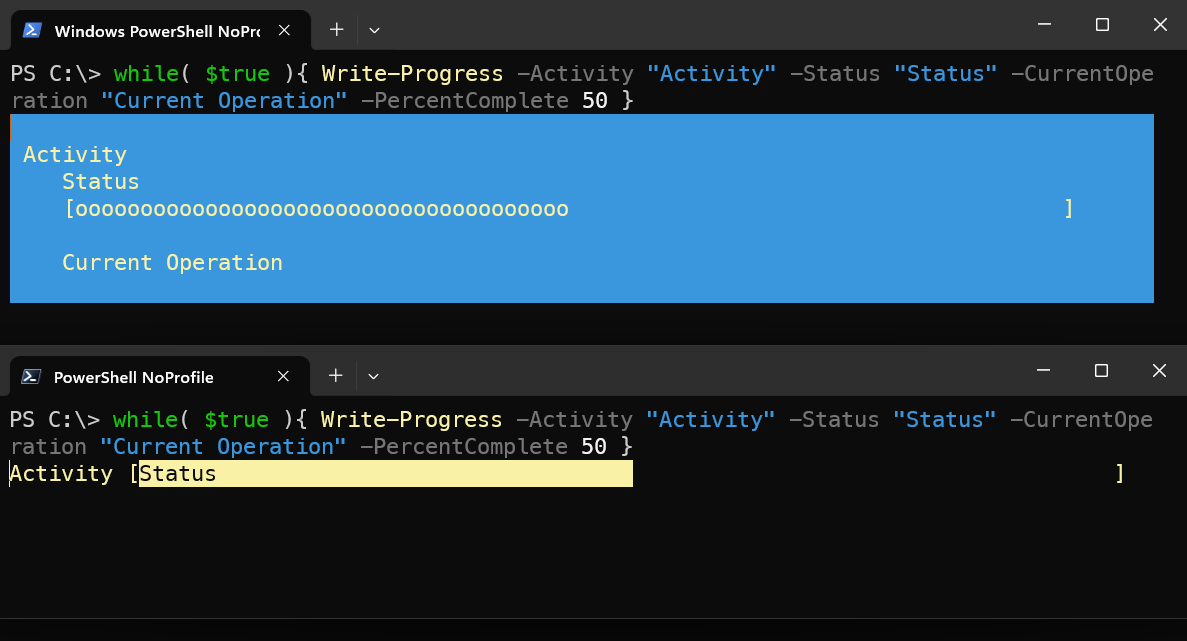
PowerShell core uses a smaller progress bar that is lightweight and runs well even in latent SSH environments. Powershell 7 adds new formatting options for progress bars that allows customizing size and style.
The image below shows the classic style on top, and the new style below.
To set the PowerShell 7 progress bar style run the following command:
#Set the view to PowerShell 5.1 mode
$PSStyle.Progress.View = "Classic"

#Set the view to Powershell 7 Mode
$PSStyle.Progress.View = "Minimal"
For the rest of the examples we will be using the classic style.
For more information on $PSStyle settings, see the Microsoft Learn Page.
Creating a static Progress Bar
Making a basic progress bar is simple. When using the Write-Progress command, only four basic parameters are required:
Activity
Status
CurrentOperation
PercentComplete
Remember that progress bars only work within loops. When run outside of a loop, the progress bar instantly disappears.
Inside of the loop, the progress bar will write continuously, appearing solid.
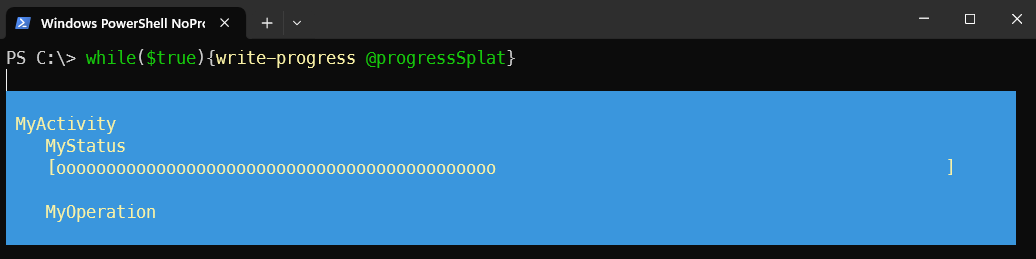
In this example, an infinite loop is created, and write-progress is executed using a splatted command:
# First create an endless while loop
While($true){
    # Now the progress bar will write continuously, appearing solid
    $progressSplat = @{
        Activity = "MyActivity"
        Status = "MyStatus"
        CurrentOperation = "MyOperation"
        PercentComplete = 50
    }
    Write-Progress @progressSplat
}
Creating a dynamic Progress Bar
To create a dynamic progress bar, the PercentComplete and SecondsRemaining parameters are updated within the loop. The PercentComplete parameter is a number up to 100 that indicates how far along the process is, while the SecondsRemaining parameter is a number that decreases as the process continues, indicating how many seconds are left until completion.
First, let's create a list of items to process:
# Create a list of items to process
$Array = 1..60
Then a stopwatch to track the elapsed time:
# Create a variable to track the start time
$timer = [Diagnostics.Stopwatch]::StartNew()
Next, we can loop through each item in the list, simulating some processing time:
# Loop through each item in the list
for ($i = 1; $i -lt $Array.Count; $i++) {
    # Simulate some processing time
    Start-Sleep -Seconds 1
Now calculate the percentage complete and the estimated seconds remaining:
# Calculate the percentage complete by dividing the current index by the total number of items
$PercentComplete = [math]::Round(($i / $Array.Count) * 100, 2)
# Calculate the elapsed time by dividing the elapsed time by the index, multiplied by the number of remaining items
$SecondsRemaining = (($timer.Elapsed.TotalSeconds / $i) * ($Array.Count - $i)).ToString("F0")
Write the new progress bar with the calculated values:
# Update the progress bar with the current activity, percentage complete, and estimated seconds remaining
$progressSplat = @{
    Activity         = "My Activity"
    PercentComplete  = $PercentComplete
    SecondsRemaining = $SecondsRemaining
}
Write-Progress @progressSplat
Finally, we can stop the timer and set the progress bar to complete:
# Stop the timer
$timer.Stop()
# Set the progress bar to complete
$progressSplat = @{
    Activity         = "My Activity"
    Completed        = $true
}
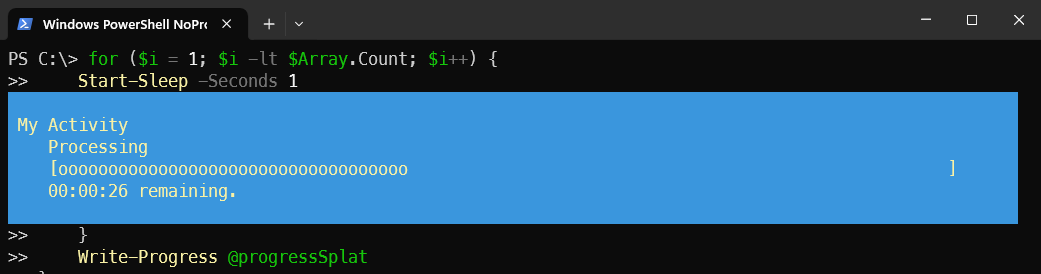
Now we get a dynamic progress bar, with timer and percent completion displayed.
Here is the entire script:
$Array = 1..60
$timer = [Diagnostics.Stopwatch]::StartNew()

for ($i = 1; $i -lt $Array.Count; $i++) {
    Start-Sleep -Seconds 1
    $PercentComplete = [math]::Round(($i / $Array.Count) * 100, 2)
    $SecondsRemaining = (($timer.Elapsed.TotalSeconds / $i) * ($Array.Count - $i)).ToString("F0")
    $progressSplat = @{
        Activity         = "My Activity"
        PercentComplete  = $PercentComplete
        SecondsRemaining = $SecondsRemaining
    }
    Write-Progress @progressSplat
}
$timer.Stop()
$endProgressSplat = @{
    Activity         = "My Activity"
    Completed        = $true
}
Write-Progress @endProgressSplat
Nesting Progress Bars
Progress bars can be nested, which allows for sub-processes to be tracked without overriding the main progress bar. To do this, you use -Id and -ParentId parameters to specify the parent progress bar.
Here's an example of how to create a nested progress bar:
while($true){
# Create a parent progress bar
$parentProgressSplat = @{
    Activity         = "Parent Activity"
    Status           = "Parent Status"
    Id               = 0
    PercentComplete  = 50
    SecondsRemaining = 60
}
Write-Progress @parentProgressSplat

# Create a child progress bar
$childProgressSplat = @{
    Activity         = "Child Activity"
    Status           = "Child Status"
    PercentComplete  = 75
    SecondsRemaining = 30
    Id               = 1
    ParentId         = 0
}
Write-Progress @childProgressSplat
}
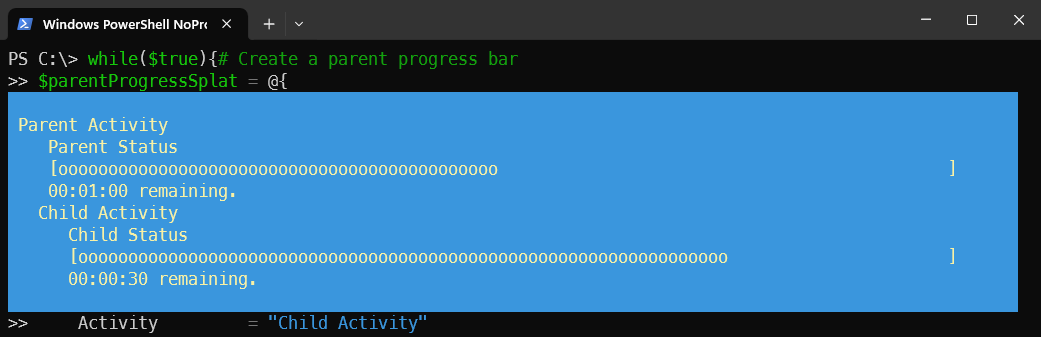
In this example, the parent progress bar is created first with an Id of 0. The child progress bar is then created with an Id of 1 and a ParentId of 0, indicating that it is a sub-process of the parent. If ParentId is not specified, the progress bar will use the previous Id as the parent.
Conclusion
Progress bars are useful when you need to show visual feedback but use them sparingly. They can slow scripts down significantly. Consider the needs of your script and whether a progress bar is necessary. When used well, they make any script feel more polished and user-friendly. Just make sure the progress information is correct!
Additional Resources
Salaudeen Rajack - How to Show Progress Bar in PowerShell with Write-Progress?
Microsoft Learn - Write-Progress